Assisted Labeling with Amazon Comprehend
Introduction
How does Datasaur help?
Datasaur enables you to automate the labeling process, reducing the need for human intervention and increasing the speed and accuracy of your results. With our assisted labeling feature, you can rest assured that your labeling process leverages the latest developments to automate the trivial work, so your human annotation team can focus on the truly interesting tasks.
Prepare the model endpoint using Amazon Comprehend
We will show you how to create a ready-to-use machine learning model through Amazon Comprehend. Before we're starting, make sure you already have the trained model from your session before. (You can also see our other articles to build the model with the Amazon Comprehend integration)
Create Endpoint
We will use the model in Datasaur, so we need to create endpoints for it.
To do this, go to Amazon Comprehend > Endpoints > Create endpoint.
Below are the configurations that we need to fill out:
- Write the endpoint name.
- Set up a custom model type. We recommend using the “Custom classification” option.
- Select our trained model, which we named “AGNews” with the “v0” version.
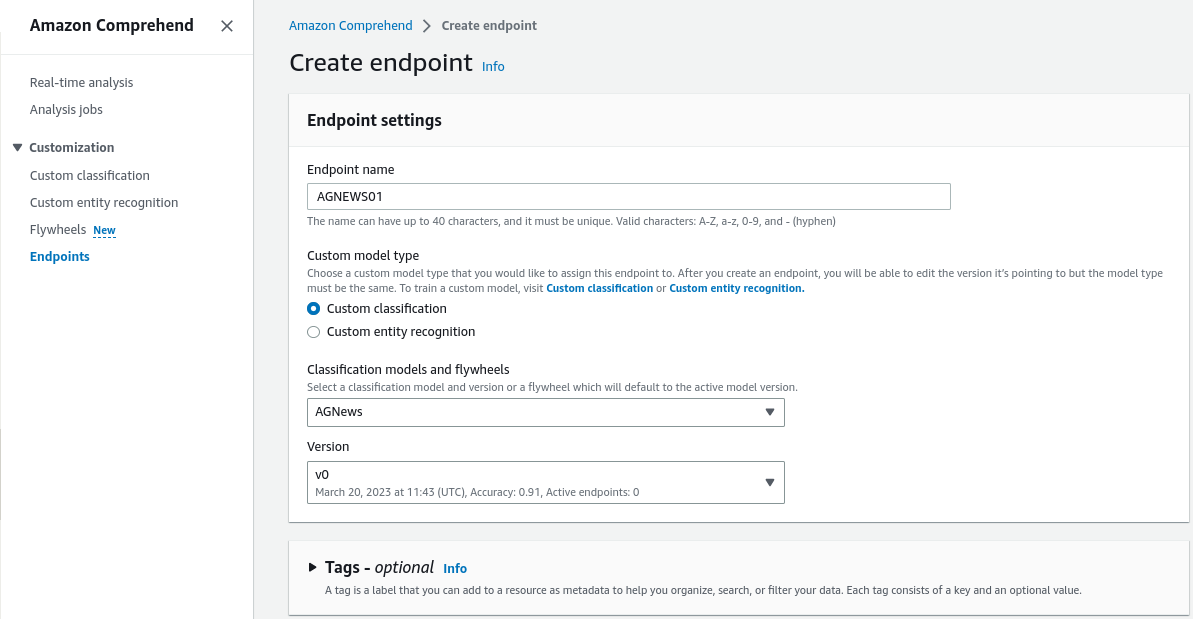
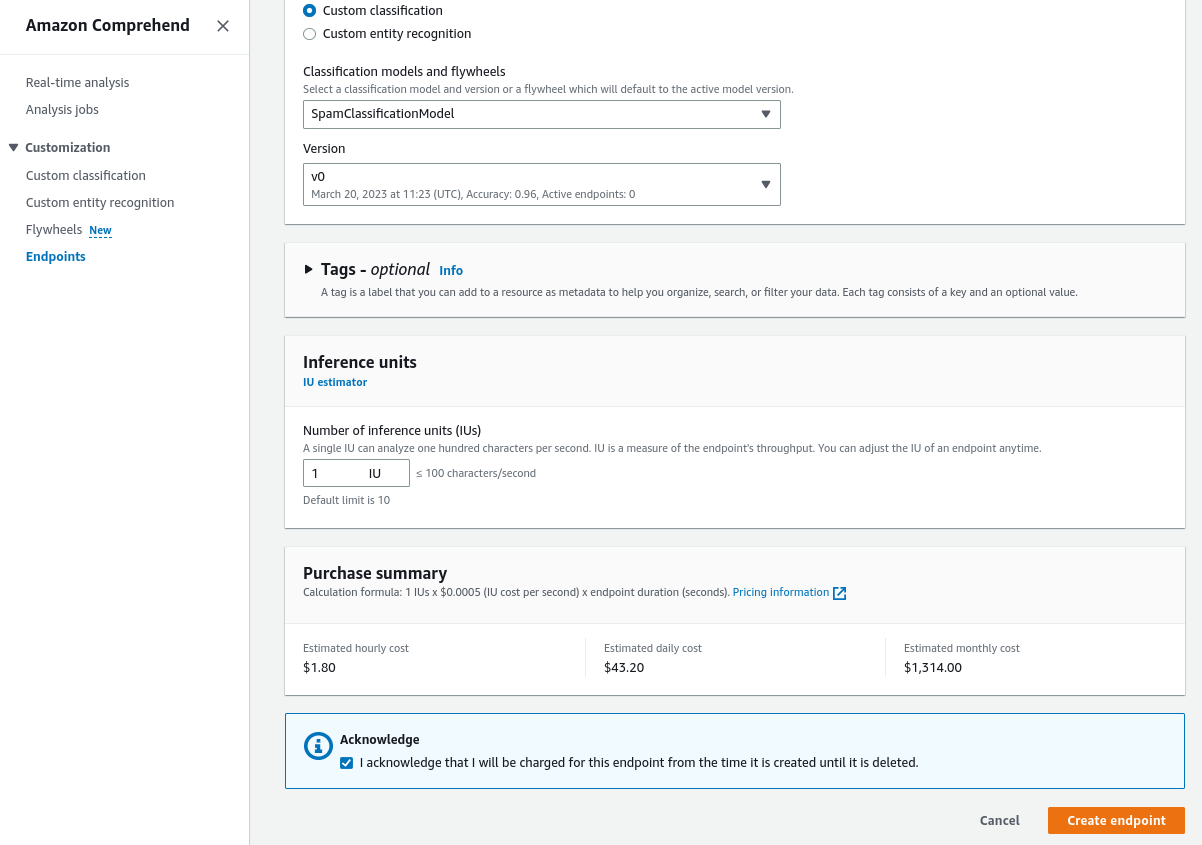
- Set up inference billing. We should use one inference unit.
- Select “Create endpoint”.
Endpoint Status
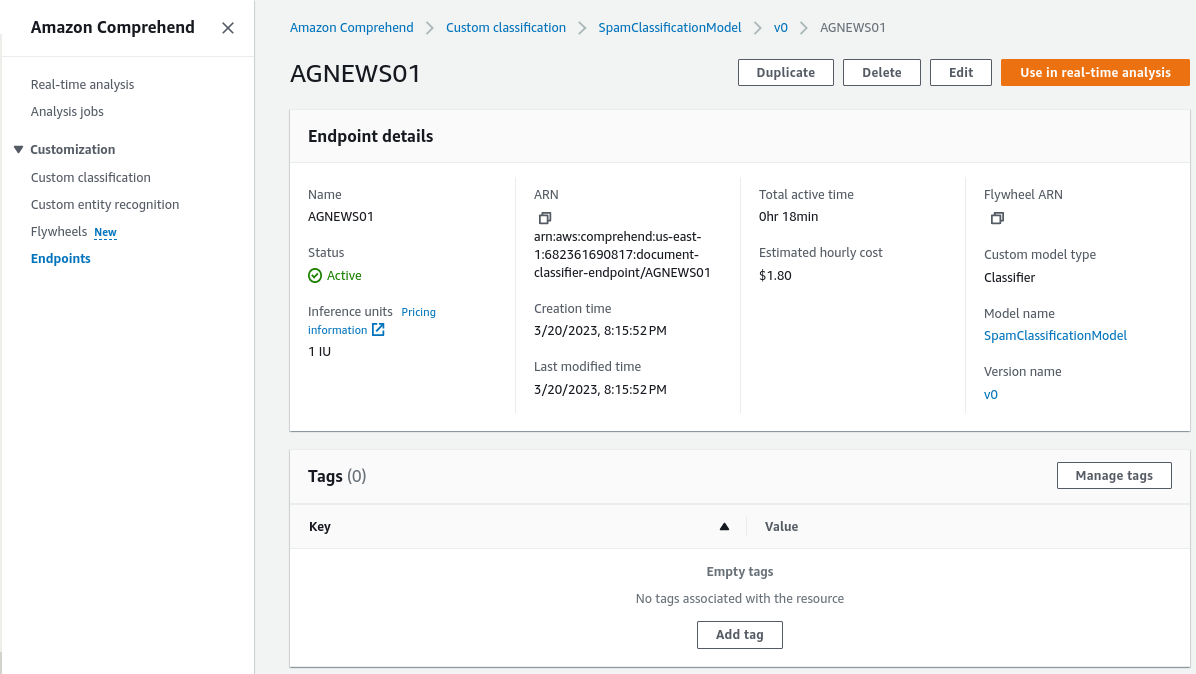
After creating the endpoint, we need to check its status.
- Go to Amazon Comprehend > Endpoints. On this page, we can see the endpoint details.
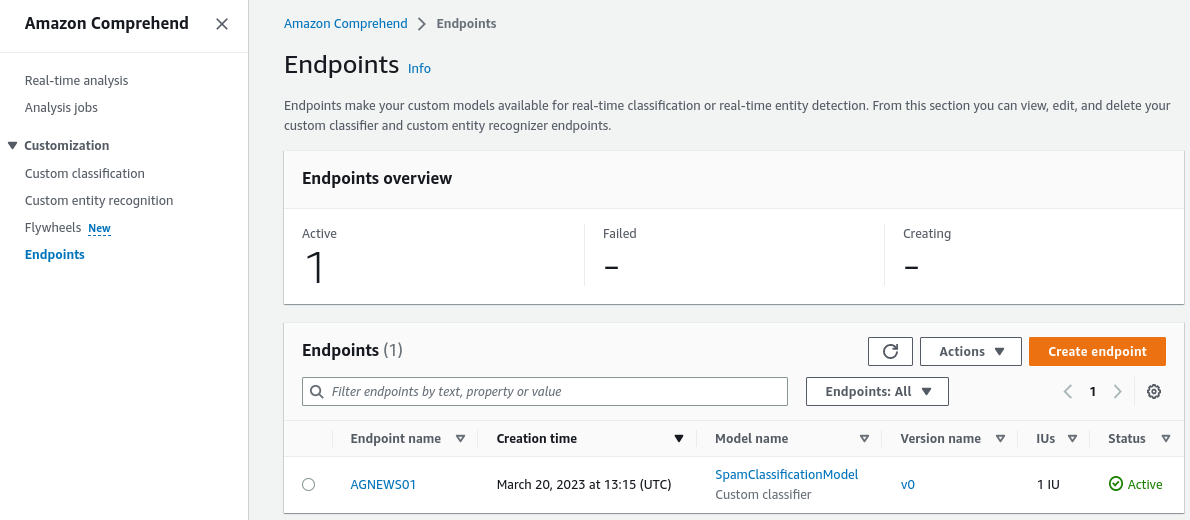
- Click “Use in real-time analysis” to test the model’s logic on custom text. This will be important for our next step.
Testing Endpoint in Real-time analysis
After creating the endpoint, we need to see the result for a specific text. If it works as expected, we can proceed to the next step.
- Go to Amazon Comprehend > Real-time analysis
- We will have a choice: Choose the analysis type as “Custom” to predict a custom model or “Built-in” to predict the default model from Amazon.
- Select the “Custom” model type and endpoint. Choose “Classification” and select our created endpoint, which we named “AGNEWS01”.
- Upload or write input text. We can select “Input text” to make it easier.
- Insert this input text:
- “NEWCASTLE, England(AP) – Striker Emile Hersey has pulled out of the England squad ahead of Wednesday #39 friendly against Ukraine because of a tight hamstring, the Football Association said Tuesday.”
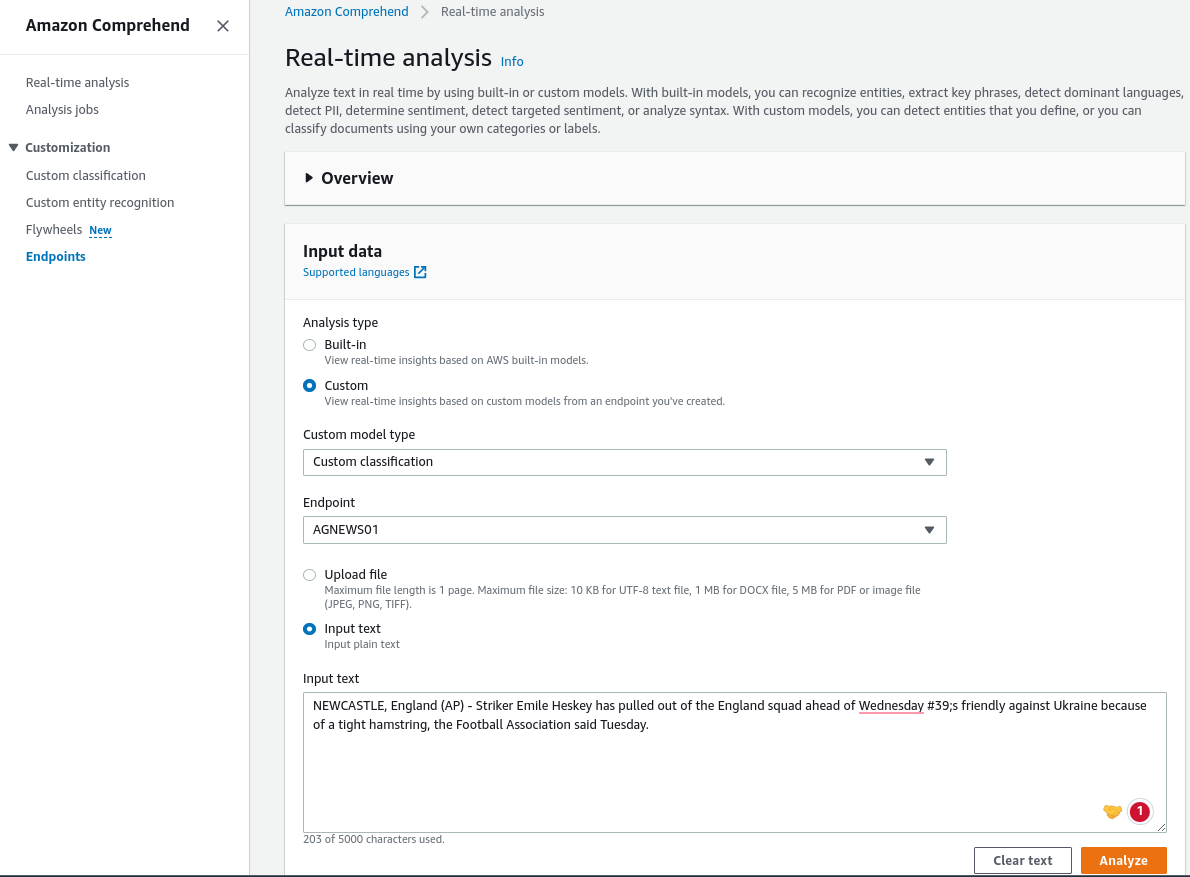
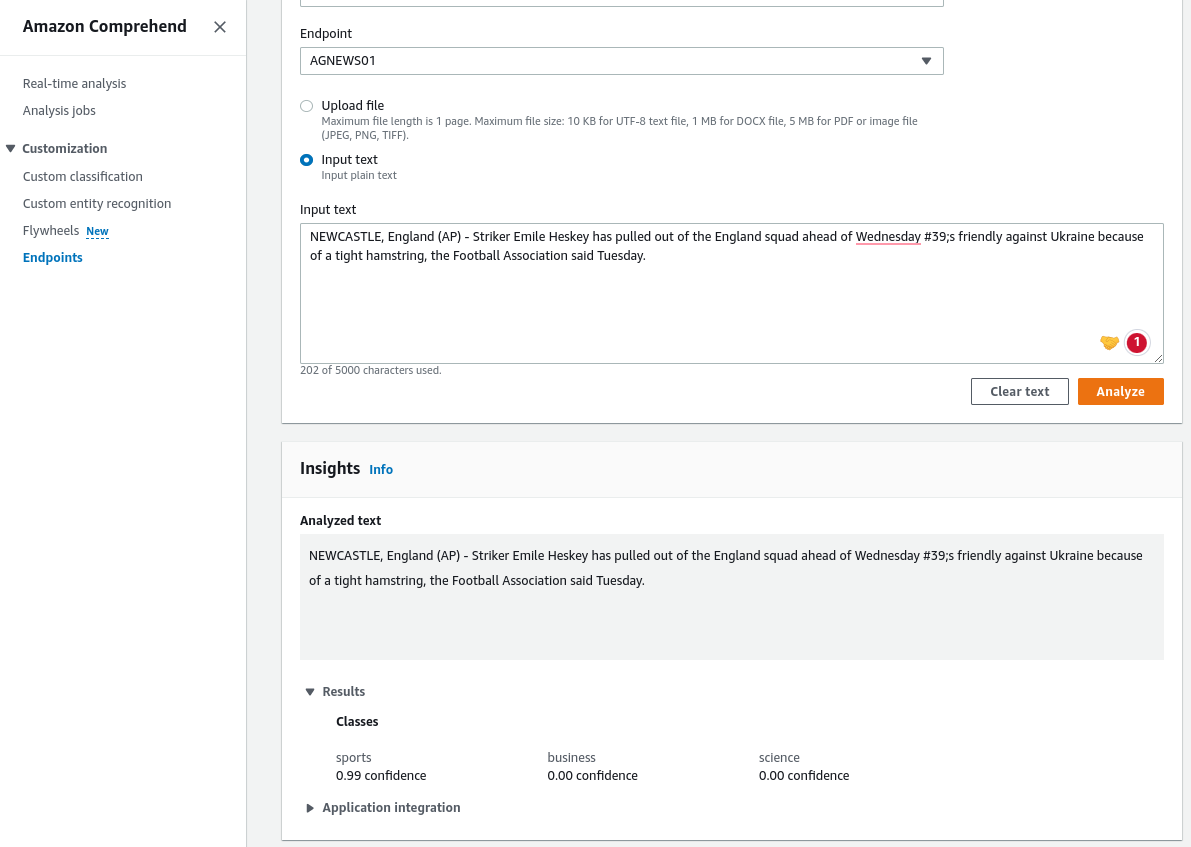
- Click “Analyze”.
- We can see the analyzed text, followed by the model performance, in the insights section.
API Call and API response
We need to make some adjustments to enable the integration between Amazon Comprehend and Datasaur’s custom API. We can create the custom function using Amazon Lambda and orchestrate the custom endpoint API using Amazon API Gateway.
Port a custom API function in AWS Lambda
- Go to Lambda > Functions.
- Click “Create Function”.

- Fill out the form for “Basic Information” and “Advanced Settings.” Set the function name as “getDocumentClassifier-point”, the runtime setting as “Python 3.9”, and instruction set for architecture as “x86_64”.
- Now, select “Create function”.

- Write the code in the editor.
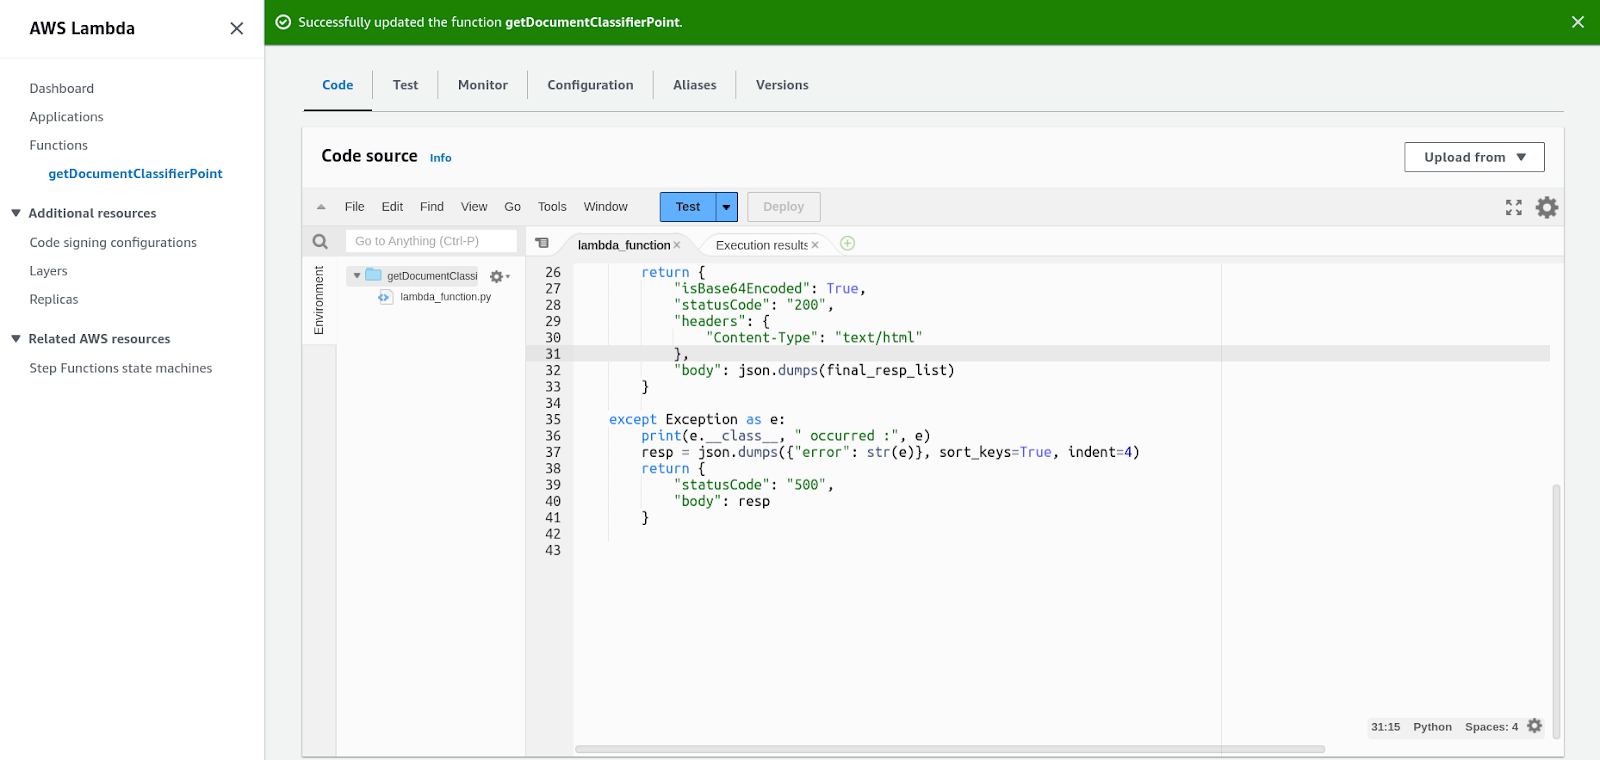
- Below is the code source that you can use:
import json
import boto3
def lambda_handler(event, context):
try:
body = json.loads(event["body"])
final_resp_list = []
for data in body:
id_ = data['id']
text = data["text"]
#Get Comprehend client
comprehend = boto3.client("comprehend")
#Use detect entities function to get a list of entities
resp = comprehend.classify_document(Text = text, EndpointArn = "{COMPREHEND_ENDPOINT_ARN}")
conf_score = [v['Score'] for v in resp['Classes']]
conf_score_max = max(conf_score)
index_max_score = conf_score.index(conf_score_max)
pred_label = resp['Classes'][index_max_score]['Name']
final_resp = {"id": id_, "label": pred_label}
final_resp_list.append(final_resp)
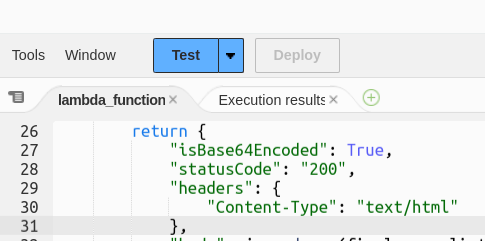
return {
"isBase64Encoded": True,
"statusCode": "200",
"headers": {
"Content-Type": "text/html"
},
"body": json.dumps(final_resp_list)
}
except Exception as e:
print(e.__class__, " occurred :", e)
resp = json.dumps({"error": str(e)}, sort_keys=True, indent=4)
return {
"statusCode": "500",
"body": resp
}
- Click “Deploy”.
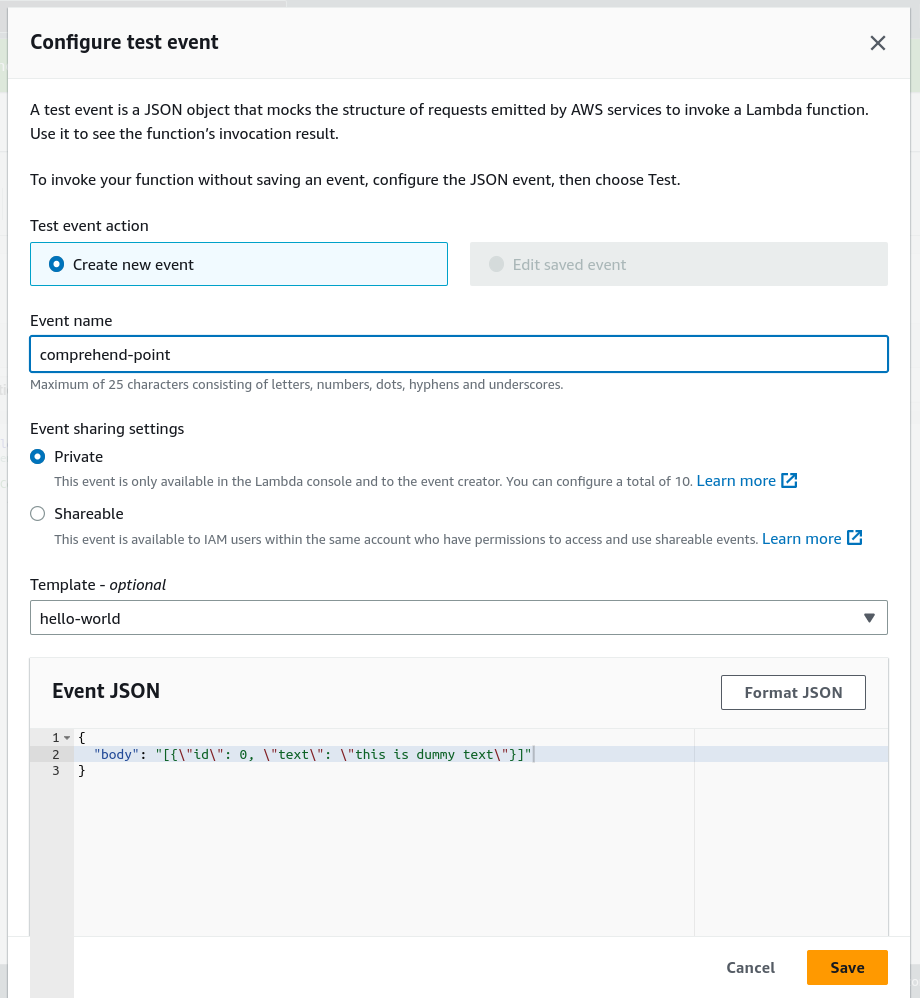
- Select “Configure test event”.
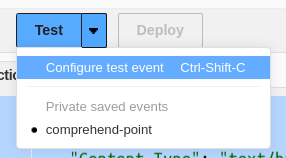
- Write dummy input to test lambda function and save it.
- Select “Create new event” in the “Test event action”.
- Write an event name. In this case, we will use “comprehend-point”.
- Write dummy input for our lambda function in “Event JSON”.
- Click “Save”.
- After the “Configure test event” dialog box is closed, select Test. We will receive a 200 status code as a successful indication of testing.
Now that the model has obtained endpoints, let's attach it to Datasaur via API.
Orchestrate Amazon Comprehend endpoint and custom function in AWS Lambda using the AWS Gateway API
In this next section, we will create the API to enable Datasaur to communicate with the trained model.
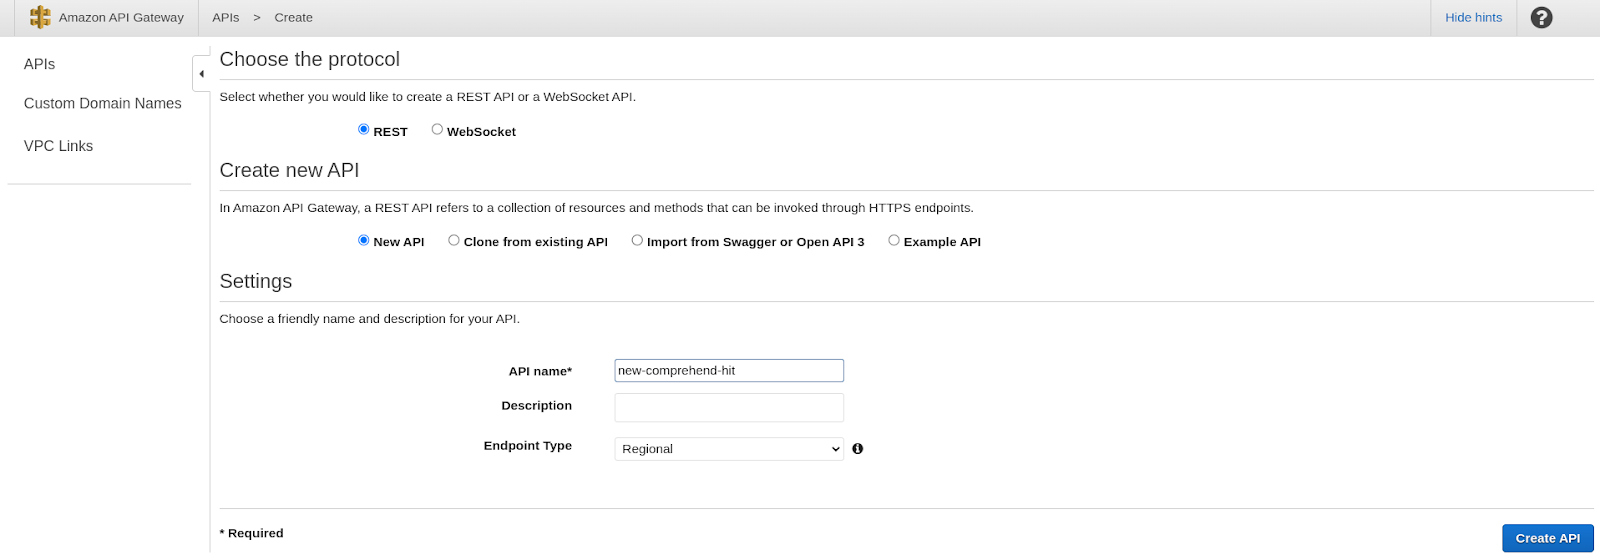
- Go to API gateway > APIs
- Select Create API

- Click Build button in REST API

- Fill in the initial setting
- Choose REST as the protocol.
- Since we are creating a new API, we can select “New API”.
- Set the name as “new-comprehend-hit”. The other settings are optional, so we can leave it empty.
- Select Create API.
- Navigate to the newly created API (named “new-comprehend-hit”) and select it.

- Now, we can begin creating the method and resource.
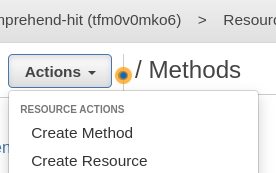
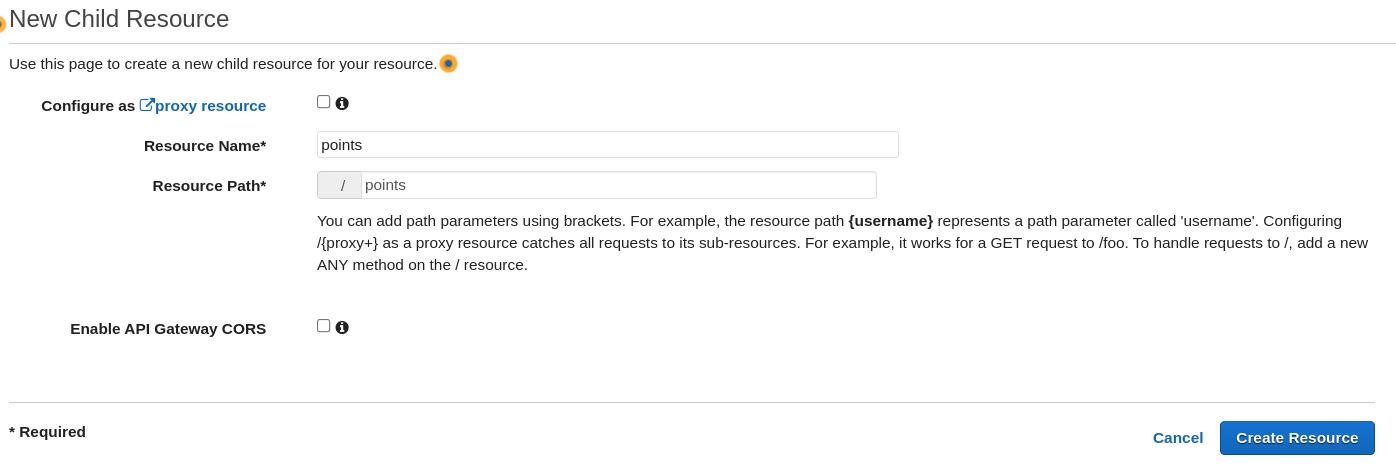
- We will start by creating the resource. Please refer to the configurations below:
- Click “Actions”.
- Select “Create Resource”.
- Fill in the “Resource name” field. We will name it “points.”
- The “Resource Path” will be generated automatically.
- Select “Create Resource.”
- Click on the created resource named “points”.
- Click on “Actions”.
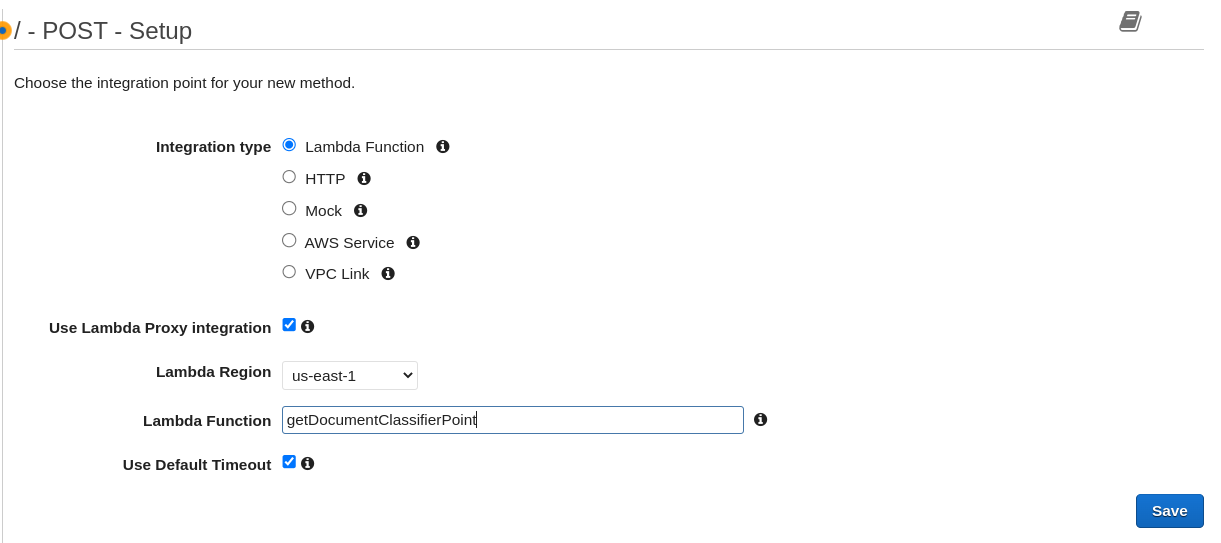
- Select “Create Method”, and in the dropdown, select POST.
- When the page loads, select “Lambda Function” on “Integration type”, check “Use lambda proxy integration” and write the lambda function name as “getDocumentClassificationPoint”.
- Check the method execution diagram, then click “Actions” and “Deploy API”.

- In this window, select the Deployment stage. We need to use the event we created earlier (named “comprehend-point”).

- Click Deploy.
- The following page will that contain a ready-to-use API URL

- The endpoint will be ready in the form of '{INVOKE_URL}/points'.
Now that we have the API URL ready for us to call, let's go back to Datasaur and test our model in the labeling interface!
Test out your model performance with Datasaur
By using your ML model, you can efficiently obtain labeled data, which can save you time and effort in the data preparation process. Below are the steps:
- Open your existing project and enable the ML-Assisted Labeling extension.

- Next, select “Custom” as the provider and use the configuration below.
- Target questions: Select the question set that you want to answer. In this case, we are using the “Category” question set from “Labeling with Datasaur” step 6, which contains “Business”, “Technology”, “Politics”, “Sports”, and “Entertainment”.
- Custom API URL: Paste your endpoint URL from the previous step.
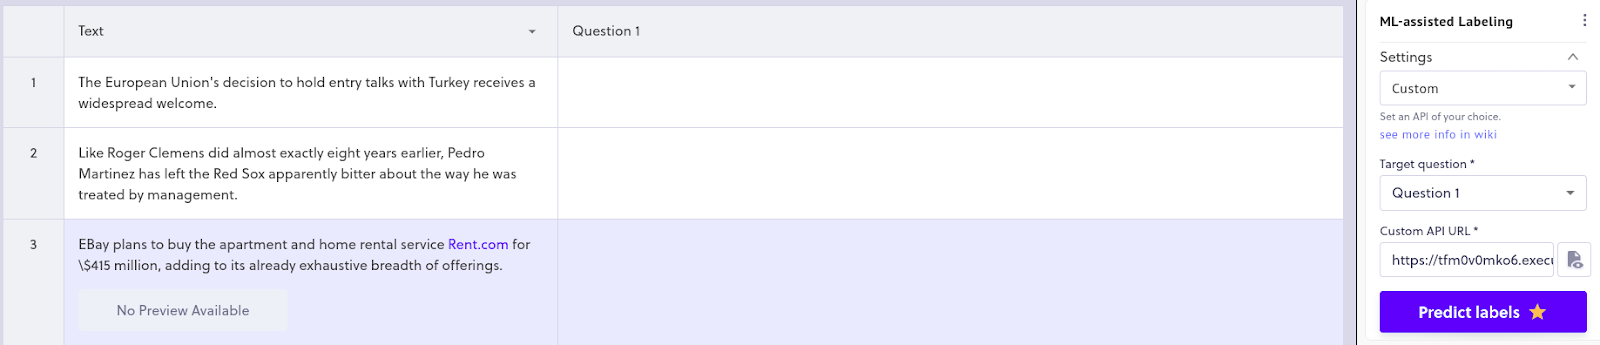
- To execute the model’s predictions, select the “Predict labels” button. The labels will be applied automatically in your project workspace.

We did it! We have now successfully built a model using Comprehend, obtained an API URL to call the model, and used that API to automatically return labels in Datasaur.
Saving your Time and Resources
In addition to updating labels in the cycle, the Datasaur - Amazon Comprehend integration can provide a range of other benefits to data scientists. For example, it can help fine-tune datasets, which can be a time-consuming and challenging task for many researchers. Furthermore, the integration can provide valuable experience to data scientists, which can be applied to a wide range of projects, whether small-scale or large-scale. With its powerful tools and features, the Datasaur - Amazon Comprehend integration can enable you to leverage your model and reuse it in Datasaur within minutes.